Loanglide Widget Library
This guide will walk you through embedding LoanGlide financing widgets on your website thus helping you convert/close more jobs. To get started, you will need an understanding of the technology your website is in. We have made it easy to add these widgets to an HTML based website or a WordPress based website. Once you’ve determined
where you’d like the financing widget to appear on your website, there are a few steps to render and ensure it works correctly
Step 1: Add LoanGlide.js to your HTML based website. Proceed to Step #2 if your website is in WordPress.
Include the below <script> snippet into the head section of global page template.
Click on Below Block to Copy Content
<script src="https://cdn.loanglide.com/prod/lib/loanglide.js" async ></script>
Click on Below Block to Copy Content
<script>
let lg_config = {
script: "https://cdn.loanglide.com/prod/lib/loanglide.js",
colors: {
backgroundColor: "#e4f5da",
primaryTextColor: "#000000",
secondaryTextColor: "#000000",
primaryColor: "#e4f5da",
primaryDarkColor: "#71c347",
},
};</script>
Step 2: Adding LoanGlide.js on a WordPress website
We now have a plugin available for installing LoanGlide widgets on your website. Please ask your account manager for the plugin zip file.
To add LoanGlide.js to your WordPress website, you will need to install a plugin named as
Insert Headers and Footers. This plugin will ease the process of adding the <script> tag to your website.
After successfully installing the plugin, from the Settings section in left option panel, select Insert Headers and Footers.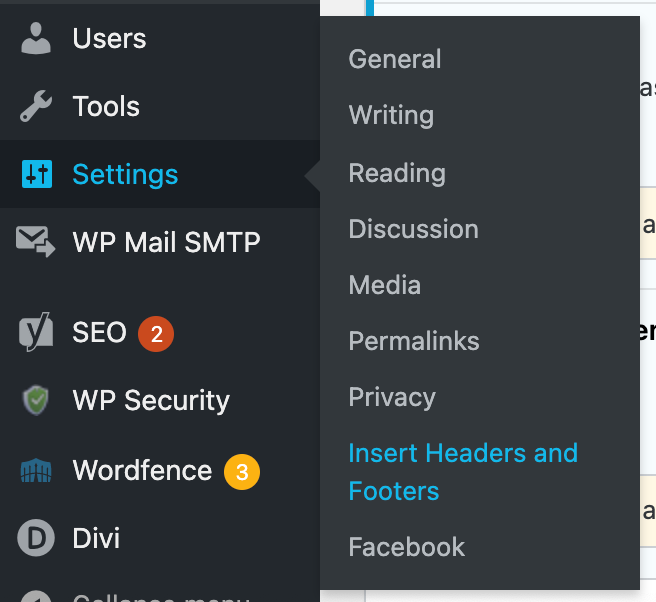
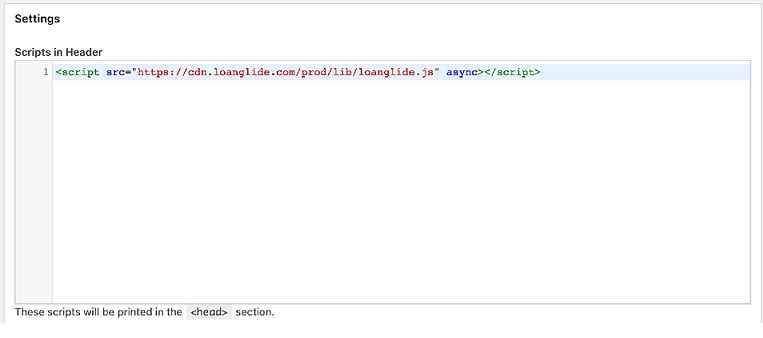
Under Scripts in Header section, add LoanGlide.js script code as shown below.
After adding the LoanGlide.js script code in Header section, save the updated settings by clicking Save button, visible at the bottom of the screen.
Step 3: Adding LoanGlide widgets to a new/existing page on your website.
After adding LoanGlide.js script code in your website via Step#1 or Step#2, you are ready to add LoanGlide widgets to your website. Once you’ve determined where you’d like the financing widget to appear on your website, follow the below examples to add a specific widget
LoanGlide financing widget
To add LoanGlide financial widget to your homepage or website’s global page add:
Click on Below Block to Copy Content
<div class="lg-header" data-business-id="BUSINESS ID HERE"></div>
Above code will add a widget that should display like this: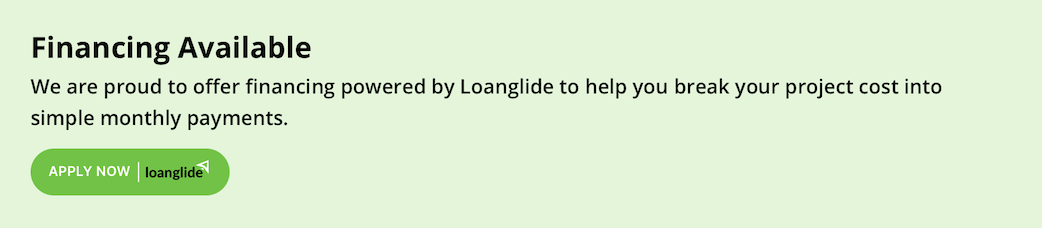
Why LoanGlide Financing widget
To add why loanGlide financing widget to your homepage or website’s global page add:
Click on Below Block to Copy Content
<div class="lg-financing" data-business-id="BUSINESS ID HERE"></div>
Above code will add a widget that should display like this: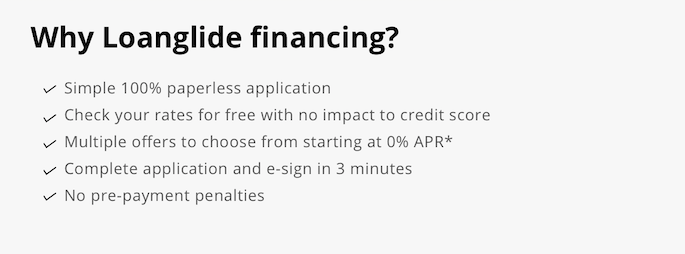
How it works video
To add how it works video add:
Click on Below Block to Copy Content
<div class="lg-video" data-business-id="BUSINESS ID HERE"></div>
Above code snippet will add a widget that should display like this:
Loan calculator
To add a loan calculator, add below code template:
Click on Below Block to Copy Content
<div class="lg-calculator" data-business-id="BUSINESS ID HERE" data-loan-purpose="HomeImprovement"> </div>
Above code snippet will add a widget that should display like this: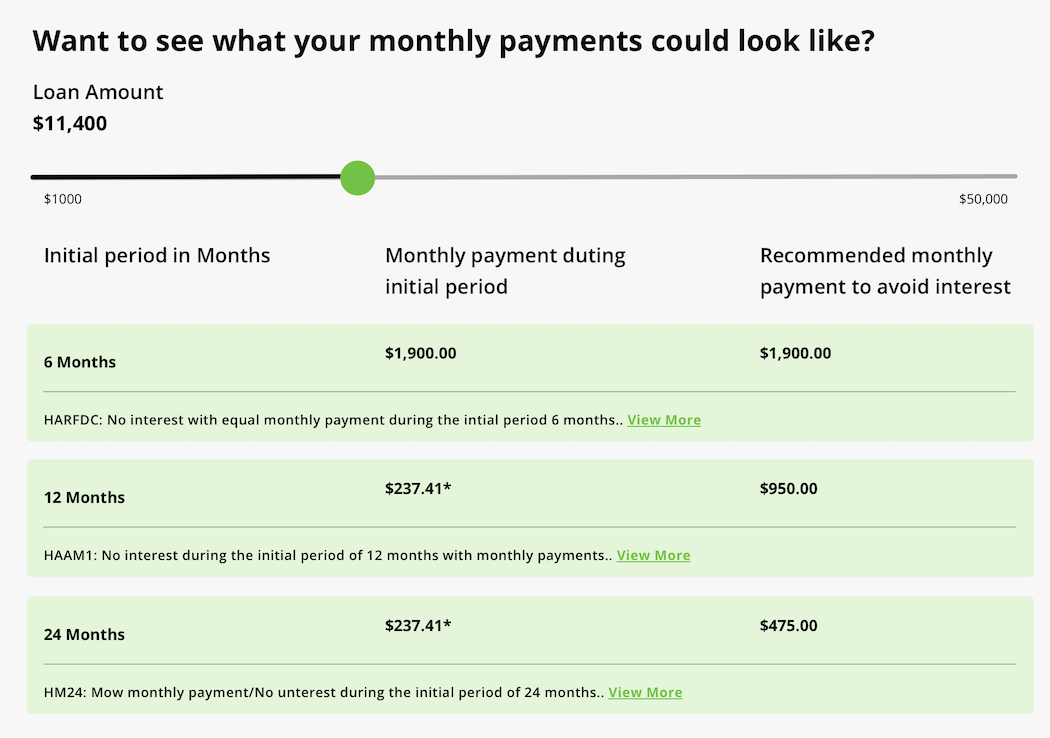
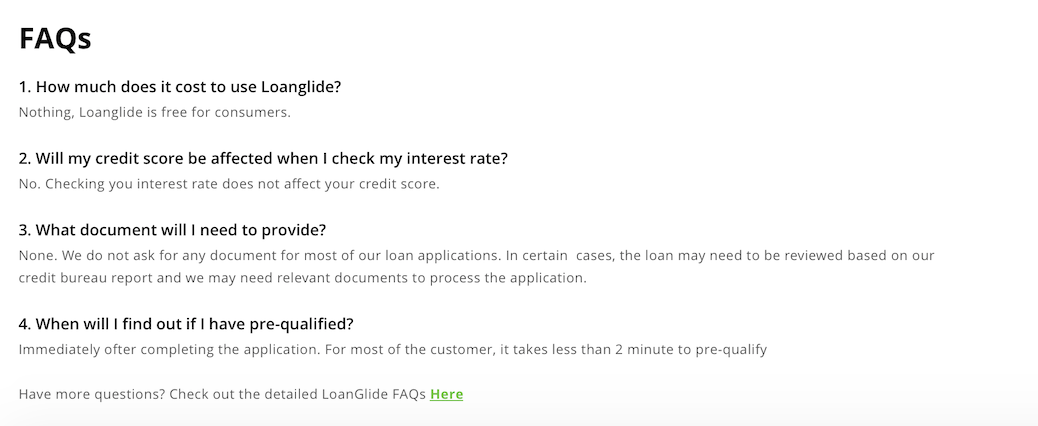
FAQ’s section
To add LoanGlide FAQ’s video add:
Click on Below Block to Copy Content
<div class="lg-faqs" data-business-id="BUSINESS ID HERE"> </div>
Above code snippet will add a widget that should display like this: